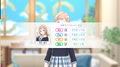
Song for Prism Produce Info
Producing idols is one of the things that you can do in Song for Prism, the others being Lives and climbing through the Challenge Tour. The overall goal of produce is to create live idols which can enable you to get high scores in the Live aspect of the game. Each Produce run costs 10 stamina, and you can recover 1 stamina every 10 minutes, or through use of a stamina restoring item. These produce runs also unlock card-, idol-, and scenario-specific commus between the idol and the producer, as well as card-specific commus for your chosen support idols, all of which delve deeper into the character of the idol.
Production Timeline
| No. of weeks | 7 weeks | 3 days* | 7 weeks | 7 Weeks | Memorial Live |
|---|---|---|---|---|---|
| Season | Season 1 | Subseason | Season 2 | Season 3 | Finish |
The production timeline for the produce mode has 3 seasons and 1 subseason. Each season lasts for 7 weeks, with the last season being an audition. Passing the audition allows you to progress further into the produce mode. Finishing all three auditions will allow you to create the fes unit from the produce idols you have chosen. This also allows you to view the memorial live for that particular unit, showcasing the game's 3D move as well as quickly look back at what you and your chosen unit have done for the past 3 seasons.
There is also the subseason which is unlocked through various criteria depending on the unit and the episode selected. More information on this can be found in it's respective section.
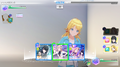
Selecting Units and Scenarios
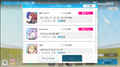
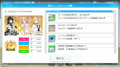
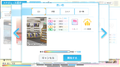
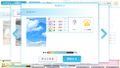
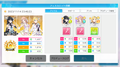
Unlike in the original Shiny Colors game, you get to produce units instead of individual idols. Each idol has their own stories and these stories have multiple episodes. Each episode can have a recommended stat to build up, as well as different produce cards and starter decks for your unit to use during lessons and auditions. Each episode as three difficulties: easy, normal, and hard. The harder the difficulty, the harder the auditions and lessons can be, but can each net out higher stats. Unlocking higher difficulties also require you to manually clear the previous difficulties at least once.

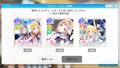
Episode Selection for Illumination Stars

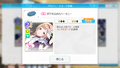
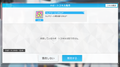
Difficulty Selection


Setting Up Units
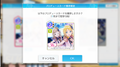
Produce Idols
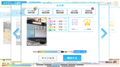
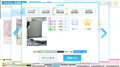
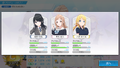
As stated earlier, unlike in the original Shiny Colors game, you can only produce full units and not individual idols. However, you can still select which version of a particular produce idol you want to produce in the unit. This is done by selecting the idol and selecting which of her produce idol versions you want to produce. If you have awakened your idol, you can also use other skills that it can have. A given produce idol can have up to 5 produce skills that it can choose to use; the available skills are dependent on what that produce idol's current awakening level is.

Unit Setup

Produce Idol Selection


Supports
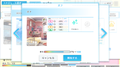
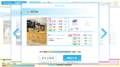
You can select up to 3 supports that you have and are not part of the unit you are producing. You can also select one guest support from the list of available producers which also includes the people in your friendslist. These supports can give you bonuses when you enter rooms that they are in, as well as unlock commus that can give bonus stats or common cards, as well as support skills which can help you in you produce run and can be inherited in future produce runs.

Support Selection Screen
Guest support selection


Inheritance
If you have created fes idols before, you can select them so that you can have a chance to inherit some of the support skills it has gained. You can check the details of the fes unit you want for inheritance by holding down on the fes idol's portrait. The inheritance only occurs during the subseason. Do note that you can only select a fes unit for inheritance a total of three times. Also, only support skills can be inherited; stats and produce/live skills cannot be inherited.

Inheritance Screen
Inheritance Screen


Produce Cards and Unit Gimmicks
See Also: Song for Prism Produce Cards
Produce Cards (not to be confused with produce idols) are the cards that your unit has in order to clear lessons, special lessons and most importantly, auditions. Each unit has their own set of cards in general, as well as common cards. Each episode per unit will only let you have certain cards at the start of the run. You can get more cards as you progress through the produce run, which will be explained later. The use of these cards cost PP. Gaining PP and using PP will be explained in later sections.
Card Types
There are nine types of produce cards. These are listed down below:
| Icon | Skill Type | Effect |
|---|---|---|
 |
Appeal | Gives Appeal Points to the Appeal Bar |
 |
PP | Adds PP or increases PP gain |
 |
Mental | Heals up lost mental or activates a mental guard |
 |
Buff | Gives buffs to your unit |
 |
Debuff | Gives debuffs to the opposing unit |
 |
Mental Loss | Reduces mental |
 |
Card | Either lets you pull a card or reshuffle your current hand to get new cards |
 |
Dodge | Adds to your current dodge chance, enabling you to dodge damage or debuffs |
 |
Special/Other | Has different effects depending on the card |
Unit Gimmicks
Each Unit has a special gimmick which is tied to the kinds of cards their units can have, in addition to the common cards. The unit gimmicks are summarized with the table below:
| Unit Icon | Unit Name | Gimmick Description |
|---|---|---|
| illumination STARS | Focused more on PP Manipulation, such as giving out PP, as well reducing PP costs for cards. | |
| L'Antica | Has the "Pinch" mental threshold; if your current mental is below that, additional effects such as appeals and buffs are activated. | |
| Houkago Climax Girls | Certain cards have effects that activate when a certain number of stat cards in their hand are met. Also has cards that increase hand size, and certain effects are activated when the hand size reaches a certain point. | |
| ALSTROEMERIA | Has the "safe" mental threshold; if your current mental is above that, certain effects such as appeals and buffs are activated. Also, the use of appeal cards can also reduce your mental so be sure to heal often! | |
| Straylight | Has three counters for how many vo/da/vi cards were used. Some cards use up these counters to enable certain effects such as appeals and buffs. Other cards also increase one or all counters. | |
| noctchill | Has cards whose effect only proc when the unit dodges either a debuff or direct damage. Also has cards that have scaling appeals and buffs based on how high the dodge rate is. | |
| SHHis | Has two modes, "Nichika Mode" and "Mikoto Mode." Card Appeals and Effects, as well as what stat these use and affect respectively, are dependent on which mode is currently active. | |
| CoMETIK | Has appeals and buffs that activate when a card is banished. Banished cards are not recycled unless cards that return banished cards to the deck are used. |
Produce Run Proper
As shown in the Production Timeline, there are three seasons, each lasting for 7 weeks. The 7th week is an audition, while the other 6 weeks can have all sorts of activities. There is also a possibility of a subseason lasting three days if conditions are met.
Season Bonuses
At the start of each season, you are allowed to choose between three season bonuses. The top most season bonus is a boost to levels for a lesson of the episode's preferred stat. The other two can either be bonus levels for a specific work request, a bonus card, a support bonus, a boost to off-day or shopping stamina regen, or a lowered trouble rate.

Season Bonuses

Activities
Each week, there will be a set number of activities that your idols can do. These activities range from lessons, special lessons, self training, work, shopping, taking a day-off, consultation, or going out. Certain subseasons also have special activities like mini-lives. Lessons and Special lessons have their own section below. The rest of the activities and their benefits are as follows:
| Type of Activity | Description |
|---|---|
| Work | Can increase stats and give out common cards. There are 5 types of work each focusing on a stat:
|
| Self Training | Can give a huge boost to a specific stat. |
| Shopping | Restores a small amount of stamina |
| Day-Off/Off | Restores a large amount of stamina |
| Going Out/Refresh | Restores a small amount of stamina, can sometimes increase stats |
| Consultation/Talk | Allows you to remove 1/2/3 produce cards from your deck depending on the season |
Some activities like lessons, special lessons and work can level up by going into these activities on a regular basis. The maximum level for these activities is five. Do note that as the level increases, so does the stamina cost. To level up an activity, you must do it twice per current level (once for special lessons). I.e. If your da lesson room is level 2, doing it twice will guarantee the room to level up to level 3.
Your maximum stamina is at 100. As stamina decreases, the rate for trouble also increases, and thus leads to the activity failing. Some activities like lessons or special lessons won't be accessible if there is insufficient stamina as well. It is therefore important to keep produce idols well rested by either doing refresh, shopping or especially taking a day off.
Your supports can also go into your activities. Up to two supports can be in an activity at a time. The support's icon can be seen in the activity image if it is there. Sometimes, the support can give out bonus cards or stats and activate one of it's abilities. If an idol's icon on the activity image is glowing, there is a chance that the support can give your unit these bonuses.
Sometimes, your idol will suggest to you a specific activity for a given week. This is shown with a light bulb logo on top of the said activity. This specific activity will have +1 to it's room level for that week, effectively increasing the stats it can give. It is not mandatory to take that activity, so you can safely do other activities for that week if you want.

Activity Selection
Work
Off
Shopping
Refresh
Idol suggested activity

Post Activity Support Commu

Support Bonus Stats

Support Ability Activated


Lessons and Special Lessons
There are three lessons and one special lesson. Each of the three lessons focuses on one specific stat; either vocal, dance or visual, and gives a huge boost to that particular stat. It does gives some points to the other stats, albeit rather small compared to the stat it focuses on. Clearing lessons can also give you unit specific cards for your deck. Special lessons on the other hand allow you to uncap cards. The maximum amount of cards you can uncap is based on what level the Special Lesson is. At maximum (level 5), you can uncap 5 cards.
Clearing Lessons and Special Lessons involves filling up an appeal bar on the upper right part of the screen. You must use cards on your deck to either fill up the appeal bar or buff your appeals to make them stronger. Initially you can have 3 cards in your hand, but certain cards and support skills can help increase the number of cards that you can hold. To use cards, simply flick the card upwards to activate it and any effects it has, provided you have PP.
Specifically for special lessons, its appeal bar also has certain thresholds. These thresholds are the main objective of special lessons. Reaching these thresholds would mean you can uncap 1 card. The higher the level of the special lesson, the more thresholds you need to clear and thus the more cards you can potentially uncap. Also, for special lessons, filling up the appeal bar ends the lesson with no added benefits.
Lessons and Special Lessons have a time limit of 30 seconds. For regular lessons, if you are unable to fill the appeal bar within that time period you will fail the Lesson. You can reset the lesson to try again, and there are no limits for resetting. For special lessons, regardless of whether or not you have met the thresholds, the special lesson will end but not fail. If you want to reset a special lesson, you have to reset before the timer expires.
As stated in the earlier sections, you need PP to use cards. Card cost is seen at the upper left part of the card. Some cards have the ability to reduce card costs when certain criteria are met. 1 PP is generated per second though this rate can go faster using cards.
There are also produce skills on the right side of the screen which you can use if you have enough PP and you meet certain requirements. Much like cards, they can fall under one of the nine card types explained above.
There is also mental involved in lessons. The mental gauge can be found on the lower right part of the screen. In general, if your mental hits 0, you wont be able to use any cards for a few seconds and your PP will reset. There are cards that can heal your mental as well as adding a mental guard which can help reduce mental damage. Some cards also downright reduce the mental damage you can take. Do note that when you are playing alstroemeria, every time you use an appeal skill you will also take mental damage so to keep your mental above the "safe" threshold you will have to heal often. On the other hand, L'antica prefers to keep their mental below the "pinch" threshold but not let it fall too low to 0.
Lessons and Special Lessons can also throw debuffs or lower your mental aswell through the cards and skills that it has. To check your buffs and debuffs look at the icons at the bottom right part of the screen below your mental gauge.
Specifically for lessons, there are also challenge missions that you can also clear to give bonus stats to one of your idols. These missions include reaching a certain stat appeal amount, or clearing a lesson within a certain amount of time, or using produce skills a certain amount of times. While these are optional, they can be a big boost to your produce idol's stats.
Lesson Selection
Lesson

Success

Success Screen
Card Choices
Card Info
Card Confirmation

Special Lesson

Special Lesson Clear

Special Lesson Card Uncap


Auditions
At the end of each season, an audition is held. The goal of the audition is similar to that of a regular lesson; to fill the appeal bar using the cards that you have. Much like lessons, you can use cards and your idol skills to achieve this goal. Hence, the gameplay for auditions is almost similar to lessons, but with a few differences. First, the appeal bar requires more appeal damage to fill up. Second, the audition has a rival, or rivals which has their own appeal bar to fill, as well as their own skills that can debuff you, hinder your ability to use skills or cards, or buff themselves to outrun you.
Failing an audition and not retrying will stop the run altogether. However, passing the audition will grant you bonus stats and will allow you to progress further in the produce run. Clearing the last audition at the end of season 3 will win you the produce run.

Audition Gameplay

Audition Success

Post Audition Success Screen


Commus
Sometimes during the course of a run, commus can appear. Commus can be grouped into four types:
- the main commu which covers the main story for the current episode
- morning commus which can occur at the start of the week and involve your chosen unit
- produce idol commus which cover interactions between the produce and one of the produce idols in the unit
- support chara commus which covers the activities of your support charas and the units they are a part of.
These commus can give your idols all sorts of bonuses. In the case of morning commus, it can give bonus stats. However, the stats the commu can give and which idol will get them is dependent on which choice you make. Fortunately if you made that choice before, the bonus stats that choice can give will be shown. For the rest of the commus, these bonuses can either be bonus stats or produce cards. For both the main commu and produce idol commus, the cards that could be given are based on the unit you are producing. For support chara commus, the cards are chosen from the pool of generic cards.
Specifically for support chara commus, they also give out a support skill. These support skills can help you out in lessons, auditions and even in challenge tour. Each support chara card has it's own support skills that it can give to your produce unit, and what it can give after a commu is chosen at random. Depending on how many supports you have brought, what rarity these supports are, and how much they are uncapped and levelled, you can have from 4 - 7 support skills. If you go beyond the limit, you can replace one of your older support skills with that new one. Also, some of these support skills can be inherited by units that use this fes unit as their inheritance source.

Morning Commu Choice
Result

Main Story Commu

Produce Idol Commu

Support Chara Commu
Support Skill List and Selection

Support Skill Gained


Subseason
More info: List of Subseason requirements
In between Seasons 1 and 2, there is a 3 day special subseason which can be unlocked when certain conditions are met during season 1. In some episodes, there can be more than one subseason. If conditions for both are met, you can choose one or the other. The subseason can give you additional activities which can give you stats and cards, depending on which activity you have chosen. Subseasons can also have special activities which can discard cards much like a talk/consultation room does.
You can also choose an idol that will participate in the subseason. The commus that are given for that idol also give out stats for that given idol, which also count for your chosen unit's overall stats.

Subseason Requirements

Subseason Choice


After the Run
Upon completing the last audition and going through the remaining commus, you have finished the produce run! The initial screen will show your final fes unit rank, as well as the total stats of the unit, and rewards. The higher the final rank, the better rewards.
The next screen will show each idols stats plus what live skills it can get. The live skills each idol can get are chosen at random. However, after the skills are selected you can swap them between your fes idols. The other tabs show your supports and the support skills you have chosen, your current produce card deck, and other produce info respectively. There is also a button next to the blue confirmation button which shows the produce log. This produce log shows the entire history of your produce run.
After confirming your live skills, your selected idols will gain experience and fans, and can help them level up. Levelling up idols can in turn can give out bonus stats, unlock costumes for a given idol, and unlock stories and other commus in the SNS apps.
Once you are ok with all of this, you are then treated to the memorial live featuring your idols and the unit song that is prominent in the episode. The memorial live looks back at the events of the main commu that unfolded during your produce run. You can skip the memorial live by tapping/clicking the screen and then selecting the skip button.

Produce Run Results
Skill Randomizer
Exp and Fan Gain

Memorial Live

Memorial Live End


Auto Produce
See Also: Song for Prism Produce Info/Auto Produce Options
Once you have completed a produce run for a given difficulty, you can now do auto produce. As the name implies, auto produce (オート) allows you to do produce runs automatically. The game will select which activities will your idols go into, whether or not they will take an off day, what cards will they add to their deck, and what stats they will focus on. These selections are still dependent on what options you have chosen in the auto produce options beside the toggle to enable auto produce. To see a translation of the auto produce options click the link above.
Once you have started in auto produce, the game will automatically select activities for your unit as well as do auditions. If the requirements for subseason are met, auto produce will also do the activities in the subseason. Do note that activities and more importantly auditions can still fail during auto produce. Should the auto produce fail at an audition is is still counted as a game over. However, if the auto produce is successful, it will go right to the post produce screen.

Auto Produce

Auto Produce

Auto Produce Result


